Whether you are embarking on a 15km chill ride to Chuon Lagoon or conquering the 50km Gia Long Tomb challenge, the secret to an enjoyable journey lies in one thing: The Perfect Bike Setup.
Setting up your bike correctly ensures that every pedal stroke is efficient and, most importantly, prevents unnecessary strain on your knees, back, and wrists. At Hue Smile Travel, we believe that a bike should fit you, not the other way around. Follow this professional guide to adjust your riding position like a pro.
 1. Why Bike Fitting Matters
A well-adjusted saddle and handlebar setup will make your riding more efficient and comfortable. For novice cyclists, we recommend setting the saddle height a little lower at first. Once you gain more confidence and get used to the rhythm, you can work towards the “ideal” height.
 2. The Toolbox: What You’ll Need
Before you start, gather these essential tools:
- Allen key multi-tool (Commonly 4mm or 5mm)
- Spanners (For older bike models)
- Screwdriver (For brake lever adjustments)
3. Step-by-Step Guide to Adjusting Your Riding Position
 Step 1: Find Your Starting Point
Remove your shoes and sit on your bike, supporting yourself against a wall for balance. Set your cranks so that the pedal furthest from the wall is at its lowest point (6 o’clock position).
Step 2: The Heel-to-Pedal Rule (Saddle Height)
Put the heel of your foot on the pedal. At this point, your leg should be completely straight.
- Too High: If your heel cannot reach the pedal, or you have to tilt your hips, lower the saddle.
- Too Low: If your leg remains bent when the heel is on the pedal, raise the saddle.
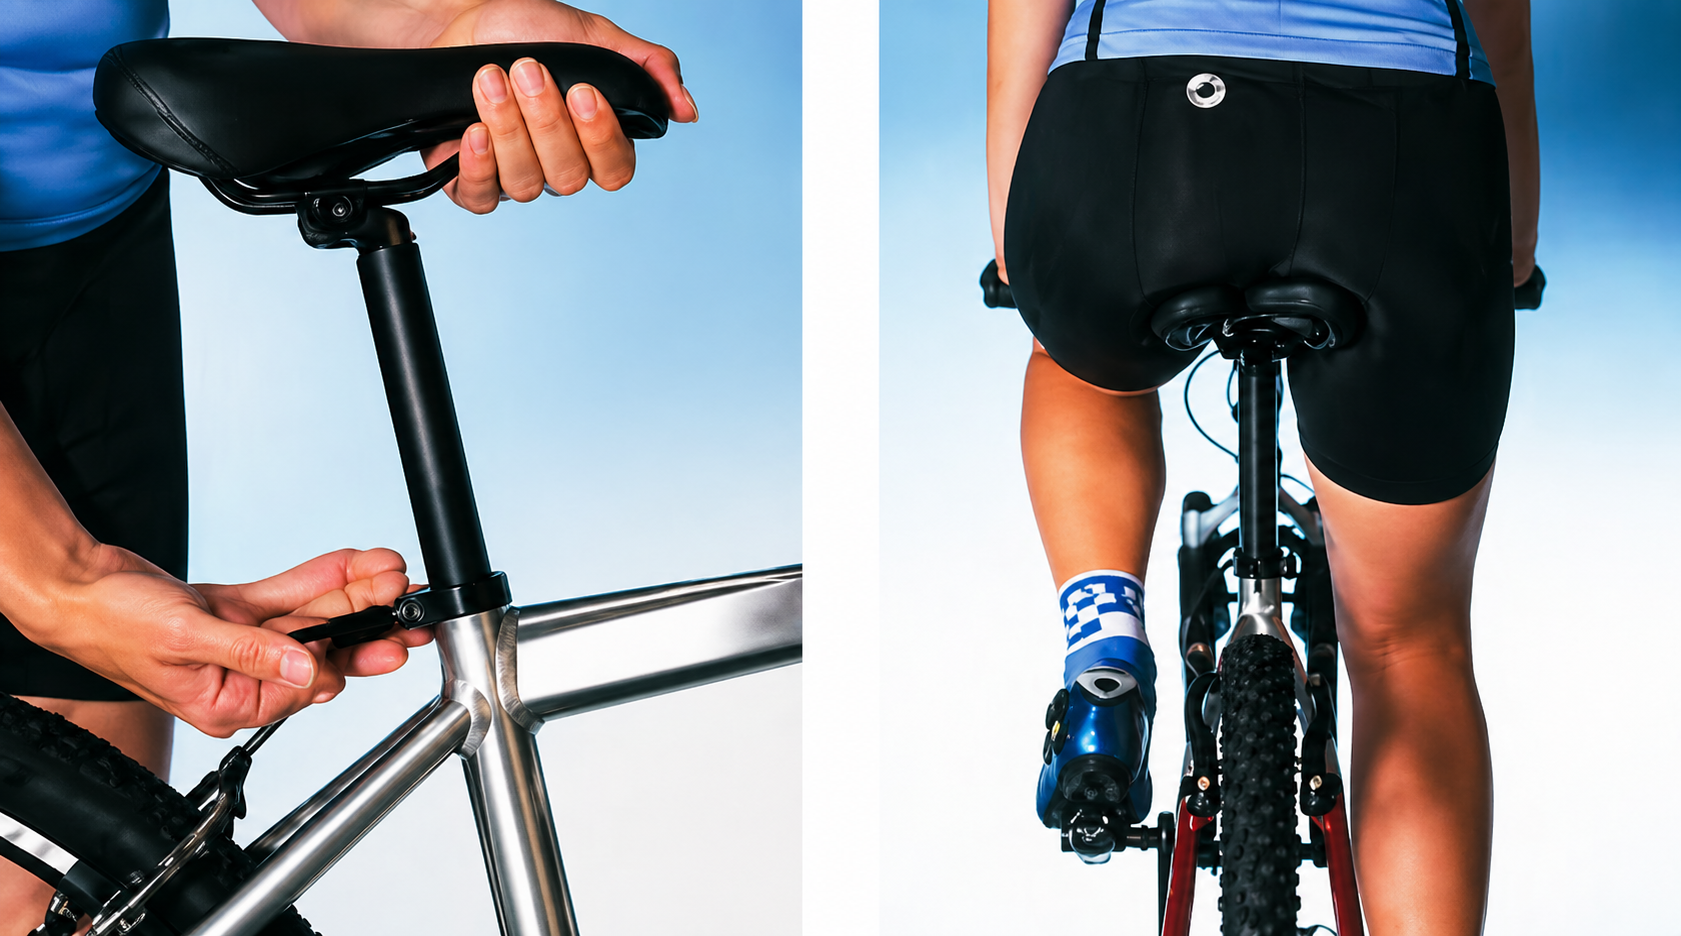
- How to adjust: Undo the seat pin clamp bolt, adjust the height, and tighten it securely. Tip: Ask a friend to help check if your leg is straight.
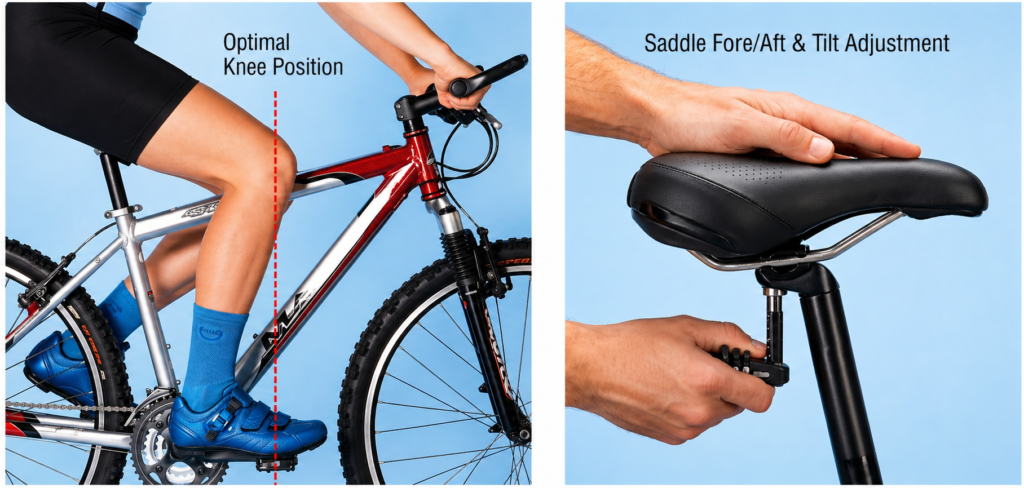
Step 3: Knee-Over-Pedal Alignment (Saddle Fore/Aft)
Place the widest part of your foot (the ball of the foot) over the pedal axle. Set your cranks parallel to the floor (3 o’clock and 9 o’clock position).
- The Check: The depression on the side of your leading leg, just behind the kneecap, should be directly over the pedal axle.
- Adjustment: Undo the saddle clamp. Move the saddle backward if your knee is too far forward, or forward if your knee is too far back.
Step 4: The Hip Stability Test
Go for a short ride in your cycling shoes. Ask a friend to ride behind you.
- The Sign: If your hips are rocking from side to side, your saddle is still set too high. Lower it slightly until your pelvis remains stable while pedaling.
 4. Perfecting Your Control: Handlebars and Brakes
Comfort isn’t just about your legs; it’s about your hands too.
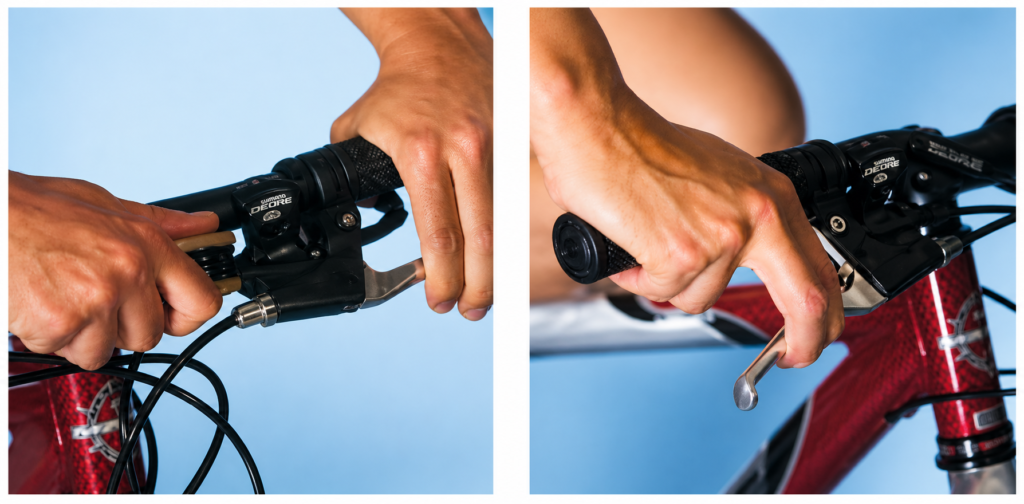
Adjusting Brake Lever Reach
If you have small hands or short fingers, reaching for the brakes can be tiring and dangerous.
- The Fix: Use the adjuster screw on each brake lever to move the lever closer to the handlebar.
- The Goal: You should be able to hook the first joints of your first two fingers over the levers while holding the handlebars securely. If you have to stretch too far, you won’t have enough braking power.
Setting the Lever Angle
Set the brake levers at an angle that aligns them perfectly with your arms. This creates a straight line from your shoulder to your fingertips, reducing wrist fatigue during long descents like the Hai Van Pass.
5. Pro Tips from Hue Smile Travel
- Cleat Positioning: If you use cycling shoes with cleats, ensure they allow your foot to sit naturally over the pedal axle.
- Listen to Your Body: If you feel pain in the front of your knee, your saddle might be too low. Pain in the back of the knee often means the saddle is too high.
- Safety First: Always double-check that all bolts (seat post, saddle clamp, and brake levers) are tightened to the manufacturer’s torque settings before you ride.